

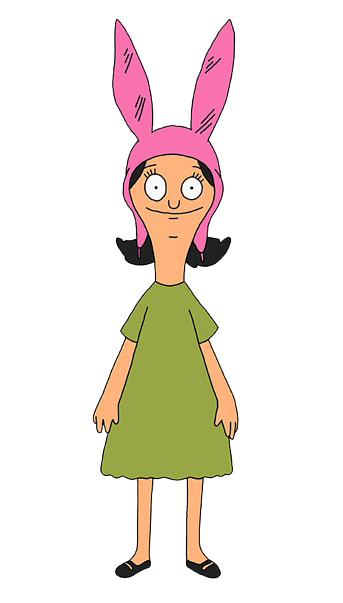
So last year, amid the depressing presidential debates, I decided to marathon Bob’s Burgers on Netflix, a cartoon featuring several talented comic voice actors that my best friend turned me onto a few years ago. I’m sure if you’re reading this post, you’re aware of it. Anyway, I hadn’t come up with a Halloween costume yet, but it struck me that the embittered and sardonic Louise (voiced by the amazing Kristen Schaal) had a look that wouldn’t be too hard to copy with yarn. I’ve been crocheting and designing my own patterns since I was 10, and a cursory Google search revealed that no one had created an amigurumi plush version of Louise’s favorite toy doll, an amorphous lime green creature named Kuchi Kopi, who occasionally receives his own plotlines within the show. So, armed with some bright yarn, I decided I’d whip one up, just to see if I could do it.
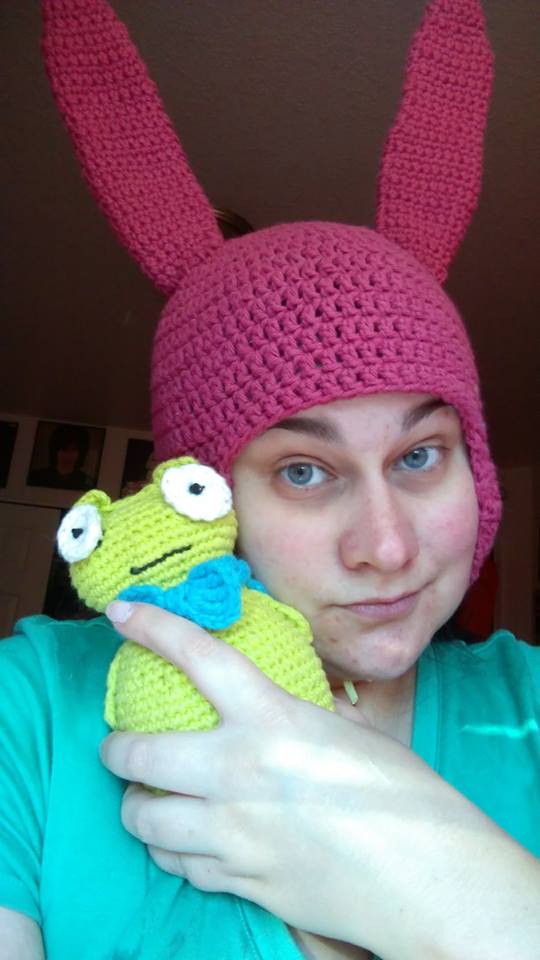
I’ve read thousands of crochet patterns, so you’d think this one might be better-written, but even after making two of these little dudes (I gave the second, better attempt to my best friend for Christmas last year), I’m still not entirely confident in this pattern. This is as close as I have to a complete pattern, but if you’ve made amigurumi before, it shouldn’t be too hard. Every technique is available on Google, from the magic ring to crocheting in the round without joining. For completion’s sake, here is the pattern I used for her bunny hat. Pipe cleaners did NOT work with the Sugar’n’Cream “Rose” yarn I used (I’m really devoted to 100% cotton yarn and loathe using acrylic) so I ended up buying some floral wire at the dollar store and mashing it into the ears in such a way that it almost works. It’s not the most stable thing I’ve ever created, but it serves its purpose. Of course, you could sew this out of fleece or even buy it at Hot Topic, but I’m stubborn and poor. It cost me less than $3 to make it myself.
KUCHI KOPI AMIGURUMI: What You’ll Need (makes one 7″ tall doll)
- Size F crochet hook (G if you crochet real tight, E if your work feels loose, I guess. You want your work to be tight enough that you can’t see stuffing through it.)
- 1 skein Sugar’n’Cream cotton yarn, color Hot Green (I can’t imagine you’d need more than one to make it, not sure how many yards I actually used)
- >1 skein Sugar’n’Cream cotton yarn, color Turquoise or Aqua for optional bowtie
- Negligible amount of white cotton yarn (it’s white, who cares what brand! But I probably used Sugar’n’Cream because #brandloyalty)
- Negligible amount of black cotton yarn (same as above)
- Large handful or two of Polyfil or other stuffing
- Yarn needle (very tiny amount of sewing involved & good for weaving in ends)
DIRECTIONS
Make a magic loop and work 6 sc into it. Pull tight, don’t join with a sl st. Mark 1st sc because now we’re gonna work in rounds!
Rnd 1: 2 sc in each sc around: 12 sc.
Rnd 2: *2 sc in 1st sc, 1 sc in next sc*, rep from * around: 18 sc.
Rnd 3: *2 sc in 1st sc, 1 sc in each of next 2 sc*, rep from * around: 28 sc.
Rnd 4: *2 sc in 1st sc, 1 sc in each of next 3 sc*, rep from * around: 35 sc.
Rnd 5: *2 sc in 1st sc, 1 sc in each of next 4 sc*, rep from * around: 42 sc. This is the base; in an ideal world, Kuchi would stand up on this base without outside support, but I failed to weight him down so he’s very wobbly. Moving onto his lil tummy…
Rnd 6: Working in back lps only, 1 sc in each sc around: 42 sc.
Rnd 7: Working thru both lps again & throughout, *2 sc in 1st sc, 1 sc in each of next 5 sc*, rep from * around: 49 sc.
Rnds 8 to 13: 1 sc in each sc around: 49 sc.
Rnd 14: *2 sc in 1st sc, 1 sc in each of next 6 sc*, rep from * around: 56 sc.
Rnd 15: Sc in each st around: 56 sc. This is his widest part! We’re going to decrease towards his neck now, because he’s basically a fat eight without holes. Which makes very little sense, now that I think about it. MOVING SWIFTLY ONWARD.
Rnd 16: *Inv dec over first 2 sc, sc in next 5 sc*, rep from * around, inv dec over last sc & 1st sc because I’m sloppy: 46 sc.
Rnd 17: Sc in each sc around: 46 sc.
Rnd 18: *Inv dec over first 2 sc, 1 sc in each of next 4 sc* rep from * around & hope the math works out: 40 sc.
Rnd 19: Sc in each sc around: 40 sc.
Rnd 20: *Inv dec over first 2 sc, 1 sc in each of next 7 sc*, rep from * around: 35 sc.
Rnd 21: Sc in each sc around: 35 sc.
Rnd 22: *Inv dec over first 2 sc, 1 sc in each of next 5 sc*, rep from * around: 30 sc.
Rnd 23: Sc in each sc around: 30 sc.
Rnd 24: *Inv dec over first 2 sc, 1 sc in each of next 5 sc*, rep from * around: 25 sc.
Rnd 25: Sc in each sc around: 25 sc.

We have gotten to his neck! This is as narrow as he gets. We’re basically going to increase back up to make his head from here. Feel free to start stuffing him now! Also, why not take a quick break and make his eyes, because you’ll need to sew them on before you finish the head?
EYES (make 2, obviously)
With white yarn, make a magic ring and work 12 dc in ring. Sl st or inv join (my new favorite method to close rounds when I’m cutting the yarn — it’s not hard!), fasten off. That’s it!
BACK TO THE HEAD
Rnd 26: *2 sc in 1st sc, 1 sc in each of next 4 sc*, rep from * around: 30 sc.
Rnd 27: Sc in each sc around: 30 sc.
Rnd 28: *2 sc in 1st sc, 1 sc in each of next 2 sc*, rep from * around: ~40 sc.
Things get dicey here because I’m having to count stitches on his head because I worked my increases a little weirdly to give him a kind of off-kilter oblong shape. What I can tell you is that his head is 10 rounds and increases quickly before decreasing down to 16 stitches. At some point, I’ll make a third one and actually count these out, but I think it’s best if I leave this up to your capable hands: make him a little fatter and then slim him back down in a similar way to his body, and you’re going to crochet or sew the final 16 stitches closed after stuffing his head and sewing on his face.
HIS LITTLE FAAAACE
Figure out the best side of your Kuchi Kopi and count down from the top about 4 rounds. Using your yarn needle and black yarn, sew on your white circles about 6 stitches apart. You should make a knot in the centers for the pupils; I tried safety eyes on my second one and they just kind of vanished into his head. Count 5 rounds down from the eyes and start your mouth so it basically covers the space between them. My first doll ended up with a little crooked smile because I’m inept, but I find him charming nevertheless. Tie this all off, leave ends inside, and stuff his brains in.
EARS
Join your yarn at one end of the 16-stitch join at the top and ch 3. Work 5 dc into the same st as your join and fasten off. Join at the other end, do the same. Easy enough.
ARMS
Ugh, okay, so this was some definite guesswork. Kuchi doesn’t really have arms so much as flippers like a penguin. You could make flippers that flop out, but that’s not really his LOOK. What I did was count down from the outer edge of each ear to about 1 rnd below his neck (narrowest part), attach my yarn, and working down each rnd for 5 rnds, I made: 2 sc, 1 hdc, 2 dc, sl st and fasten off. It’s not perfect.
OPTIONAL TURQUOISE BOWTIE
To be honest, I just used a quick bow pattern I found that is similar to the one in this YouTube link and crocheted a chain a little longer than his neck, then lashed everything together and wrapped it awkwardly so I could take it off whenever I wanted because he only really wears it in that episode where Bob hallucinates that he’s in The Shining and Kuchi Kopi is his bartender. You know, that one. Anyway, I thought it was cute and jaunty, so mine wears his all the time.
I think normal patterns have a concrete ending, but mine is kinda… wing it until you have something that looks like what I made! AT SOME POINT, I will update this so it’s less of a disaster, but hey, it’s free. Enjoy?
